📌Index
✔️ 최신 docker 명령 구조
$ docker container <sub-command>$ docker image <sub-command>$ docker network <sub-command>$ docker volume <sub-command>✔️ 이미지
local 이미지 목록 확인
$ docker images$ docker image ls$ docker image <sub-command>- sub-command : tab+tab
$ docker image
build    -- Build an image from a Dockerfile
history  -- Show the history of an image
import   -- Import the contents from a tarball to create a filesystem image
inspect  -- Display detailed information on one or more images
load     -- Load an image from a tar archive or STDIN
ls       -- List images
prune    -- Remove unused images
pull     -- Pull an image or a repository from a registry
push     -- Push an image or a repository to a registry
rm       -- Remove one or more images
save     -- Save one or more images to a tar archive (streamed to STDOUT by default)
tag      -- Tag an image into a repository
docker ps는 컨테이너 목록 확인
Docker Hub 이미지 검색(search)
$ docker search <TERM>
이미지 풀링(pull)
$ docker pull <IMAGE>:<TAG>
$ docker image pull <IMAGE>
- 이미지를 pulling 할 때는 해시값을 이용하는 것을 권장한다
$ docker pull <IMAGE>@<HASH>
예시
7, 7.9.2009, centos7, centos7.9.2009 태그를 가진 centos 이미지는 모두 IMAGE ID가 같다.
모두 같은 이미지인 것일까❔
$ docker images
REPOSITORY    TAG              IMAGE ID       CREATED        SIZE
centos        7                eeb6ee3f44bd   7 months ago   204MB
centos        7.9.2009         eeb6ee3f44bd   7 months ago   204MB
centos        centos7          eeb6ee3f44bd   7 months ago   204MB
centos        centos7.9.2009   eeb6ee3f44bd   7 months ago   204MB
7, centos7 는 최신 이미지에 붙여놓는 태그로, 시점에 따라 다르다.
즉, 현재는 같은 이미지이지만, 새로운 최신 버전이 나오면 태그가 바뀔 것!
SW의 버전을 바꾸는 것은 서버에서 매우 민감한 문제이고,
버전 업데이트가 되면서 사용하는 애플리케이션에서 제대로 작동하는 것을 보장할 수 없다.
7.9.2009, centos7.9.2009 는 변하지 않겠지만(버전을 아예 명시해뒀기 때문),
실무에서는 버전이 굉장이 중요하고, 버전에 따라 사용하지 못하는 기술이 있을 수도 있으므로 주의해야한다.
특히 latest 태그는 절대 사용하면 안된다
이러한 부분을 해결하기 위해 ⭐해시를 사용하는 것이 가장 정확함(내용이 바뀌면 hash 값도 바뀌기 때문)
$ docker pull centos@sha256:8faead07bd1d5fdd17414a1759eae004da5daa9575a846f4730f44dec0f47843해시값은 Docker Hub의 태그에서 DIGEST 값을 확인할 수 있음
삭제할 때도 hash 값을 붙여 사용할 수 있음
이미지 삭제(rmi)
docker rm은 컨테이너 삭제- 컨테이너에서 사용중인(실행중인 혹은 stopped) 이미지는
rmi로 삭제 불가
$ docker rmi <IMAGE>
이미지 상세정보 확인
$ docker inspect <IMAGE>ContainerConfig vs Config
ContainerConfig: 이미지를 최초 생성할 때 사용했던 설정Config: 가장 최근에 이미지 생성 시 사용했던 설정 => 컨테이너를 만들 때 적용되는 것ConfigEnv: 환경 변수Cmd: 실행할 애플리케이션⭐docker ps -a명령 시COMMAND에 표시되는 항목
ExposedPorts: 열린 포트(port)WorkingDir: application이 실행될 경로, 작업 디렉토리VolumeEntrypointVolumes
예시
"Config": {
            "Hostname": "", #호스트명
            "Domainname": "",
            "User": "",
            "AttachStdin": false,
            "AttachStdout": false,
            "AttachStderr": false,
            "Tty": false,
            "OpenStdin": false,
            "StdinOnce": false,
            "Env": [ #환경변수
                "PATH=/usr/local/sbin:/usr/local/bin:/usr/sbin:/usr/bin:/sbin:/bin"
            ],
            "Cmd": [ #실행할 애플리케이션
                "/bin/bash"
            ],
            "Image": "sha256:ba35a4b787c8f11e3b6ed9248c7663b4f27459e9715a1ace09f966259d5ebc3a",
            "Volumes": null,
            "WorkingDir": "",
            "Entrypoint": null,
            "OnBuild": null,
            "Labels": { #이미지와 관련된 정보를 넣는 주석
                "org.label-schema.build-date": "20201113",
                "org.label-schema.license": "GPLv2",
                "org.label-schema.name": "CentOS Base Image",
                "org.label-schema.schema-version": "1.0",
                "org.label-schema.vendor": "CentOS",
                "org.opencontainers.image.created": "2020-11-13 00:00:00+00:00",
                "org.opencontainers.image.licenses": "GPL-2.0-only",
                "org.opencontainers.image.title": "CentOS Base Image",
                "org.opencontainers.image.vendor": "CentOS"
            }
},- 포맷 사용하기 : 고랭 템플릿
- 상세정보 원하는 것만 뽑아서 확인하기
$ docker inspect centos:7 --format '{{ .Config.Cmd }}'
[/bin/bash]
$ docker image inspect mariadb:10.7 -f '{{ .Config.Cmd }}'
[mariadbd]$ docker inspect mariadb:10.7 --format '{{ .Config.Entrypoint }}'
[docker-entrypoint.sh]컨테이너 IP 확인
$ docker inspect 16a -f '{{ .NetworkSettings.IPAddress }}'참고) mysql은 태그를 붙여줘야함 : latest 태그가 없기 때문
참고) rc : 테스트버전, 테스트용
참고) COMMAND
- 절대 경로로 실행하는 경우 (예:
/bin/bash) - 상태경로로 실행하는 경우 (예:
bash) :PATH변수에 의존- PATH에서 명령어 찾음
예시: ubuntu
- 환경 변수가 중요함 : Env
$ docker inspect ubuntu -f '{{ .Config.Env }}'- 아래 목록에 없으면 실행하지 못하는 명령어
[PATH=/usr/local/sbin:/usr/local/bin:/usr/sbin:/usr/bin:/sbin:/bin]
이미지 저장/아카이브
- 이미지의 내용을 확인하고 싶을 때 사용
- 이미지를 파일로 다시 저장
docker save <IMAGE> -o <FILE>$ docker save hello-world -o hello-world.tar
$ file hello-world.tar
hello-world.tar: POSIX tar archive- 압축 풀어보기
참고) hello-world는 layer가 1개 => pull 할 때 한줄 확인할 수 있음
$ mkdir hello-world
$ tar xf hello-world.tar -C hello-world
$ ls hello-world
c28b9c2faac407005d4d657e49f372fb3579a47dd4e4d87d13e29edd1c912d5c       manifest.json
feb5d9fea6a5e9606aa995e879d862b825965ba48de054caab5ef356dc6b3412.json repositories- 아카이브 해제할 때는 디렉토리를 만들어놓고 풀기 : 파일의 내용이 많기 때문
$ cd hello-world/c28b9c2faac407005d4d657e49f372fb3579a47dd4e4d87d13e29edd1c912d5c~/hello-world/c28b9c2faac407005d4d657e49f372fb3579a47dd4e4d87d13e29edd1c912d5c $ ls
VERSION json layer.tar~/hello-world/c28b9c2faac407005d4d657e49f372fb3579a47dd4e4d87d13e29edd1c912d5c $ tar xf layer.tar~/hello-world/c28b9c2faac407005d4d657e49f372fb3579a47dd4e4d87d13e29edd1c912d5c $ file hello
hello: ELF 64-bit LSB executable, x86-64, version 1 (SYSV), statically linked, strippedhello-world이미지는 실행파일hello1개
~/hello-world/c28b9c2faac407005d4d657e49f372fb3579a47dd4e4d87d13e29edd1c912d5c $ ls
VERSION  hello  json  layer.tar
~/hello-world/c28b9c2faac407005d4d657e49f372fb3579a47dd4e4d87d13e29edd1c912d5c $ ./hello
Hello from Docker!
This message shows that your installation appears to be working correctly.
To generate this message, Docker took the following steps:
1. The Docker client contacted the Docker daemon.
2. The Docker daemon pulled the "hello-world" image from the Docker Hub.
(amd64)
3. The Docker daemon created a new container from that image which runs the
executable that produces the output you are currently reading.
4. The Docker daemon streamed that output to the Docker client, which sent it
to your terminal.
To try something more ambitious, you can run an Ubuntu container with:
$ docker run -it ubuntu bash
Share images, automate workflows, and more with a free Docker ID:
https://hub.docker.com/
For more examples and ideas, visit:
https://docs.docker.com/get-started/참고) mariadb는 layer 9개
이미지 가져오기
- 지웠던 이미지를 다시 가져올 수 있음
$ docker load -i <FILE>- 누군가가 이미지를 새로 만들고 save한 뒤, tar 아카이브 파일로 보내서 가져올 때 사용
- registry가 생기면서 잘 사용하지 않는 방법이 됨
예시
$ docker rmi centos:7
Untagged: centos:7
$ docker load -i centos7.tar
Loaded image: centos:7
✔️ 컨테이너
- LifeCycle
create -> start -> (pause) -> (unpause) -> (kill) -> (restart) -> stop -> rm
run ---------->
🔹 컨테이너 목록 및 실행
현재 실행중인 컨테이너 목록 출력
$ docker ps
모든 컨테이너 목록 출력
$ docker ps -a-q: quiet , 컨테이너의 id만 확인
$ docker ps -aq- 참고) 컨테이너들 한번에 지우고 싶을 때? (실제론 위험해서 잘 사용하면 안됨)
- 현재 실행중인 것은 삭제 안됨 (또는
-f까지하면 실행중인 것 까지 삭제)
$ docker rm `docker ps -aq`
컨테이너 실행
$ docker run <IMAGE>
$ docker run --name <IMAGE>--name옵션으로 컨테이너 이름 지정- 동일한 이름의 컨테이너는 생성되지 않음
컨테이너에서 실행
echo, ls 와 같이 옵션없이 그저 실행되고 종료되는, 별도로 표준 입력을 줄 필요가 없는 경우
- echo 명령어를 ubuntu에서 실행
$ docker run ubuntu echo "hello world"
hello world
CONTAINER ID IMAGE COMMAND CREATED STATUS
PORTS NAMES
fba7........ ubuntu "echo 'hello world'" 59 seconds ago Exited (0) 59 seconds ago- ls 명령어를 ubuntu에서 실행
$ docker run ubuntu ls
bin
boot
dev
etc
...- 참고) 아래 명령은 실행 안됨 : 이미지 내에 bash 명령어가 없기 때문
- hello-world 이미지에는 hello 명령만 있음
$ docker run -it hello-world bash🔹 watch
- 매 2초(default)마다 명령어를 실행해서 화면에 보여줌
- 우측 상단에 마지막으로 실행한 시간
$ watch [명령어]예시
$ watch docker ps -aEvery 2.0s: docker ps -a docker: Wed May 4 11:44:22 2022
CONTAINER ID IMAGE COMMAND CREATED STATUS PORTS NAMES
de96........ httpd "httpd-foreground" 5 hours ago Exited (0) About an hour ago nervous_khayyam
5066........ httpd "httpd-foreground" 6 hours ago Exited (0) About an hour ago blissful_wright
87e0........ httpd "httpd-foreground" 7 hours ago Exited (0) About an hour ago charming_goodall
9026........ ubuntu "bash" 8 hours ago Exited (0) 8 hours ago nervous_shtern- n초 마다 명령어 실행
$ watch -n [시간] [명령어]-d옵션(different) : 달라지는 부분 하이라이팅
$ watch -n [시간] -d [명령어]
🔹 Option
- 옵션 없음: Docker Daemon ---stdout/stderr---> Docker Clinet
--name과 같은 옵션 아님, 실행과 관련된 것들echo,ls등 : 실행되고 종료되는 것. 표준 입력을 줄 필요가 없음
-it: Attach 모드(stdin/stdout/stderr 연결) -> Foreground-i: stdin 유지-t: Terminal 할당ctrl + p + q: 실행중인 상태에서 빠져나올 수 있음(프로세스를 종료시키지 않음)docker attach명령으로 연결 가능, 다시 접속, 단-it옵션 사용한 경우만- vscode에서는 사용 불가능
- 참고)
hello-world는 bash 불가능 :hello명령어 밖에 없음
-d: Detach 모드(stdin/stdout/stderr 연결 해제) -> Background 실행-itd
⭐ 하나의 컨테이너에는 하나의 애플리케이션만 실행하는게 원칙
안되지는 않으나, 그럴 거면 컨테이너를 사용하는 이유가 없음 => antipattern :설계된 원리/의도를 무시하고 사용
재시작 정책 : --restart
start-containers-automatically
default : no, 재시작하지 않는다always: 항상 재시작(자주 사용), 오류가 발생하거나 의도적으로 중단(docker stop) 시킨 경우를 제외하고 항상 재시작on-failure: application 에러가 발생했을 때만 재시작unless-stopped: always와 유사하나 docker daemon이 restart했을 때 restart하지 않음(많이 사용X)
$ docker run --restart <no|always|on-failure|unless-stopped> <IMAGE>예시 : always
$ docker run -it --restart always ubuntu
root@4af3d933349e:/# exit
exit
원래 같으면 종료되어 있어야하나, UP 실행되고 있는 것을 확인할 수 있음
$ docker ps
CONTAINER ID   IMAGE     COMMAND   CREATED          STATUS         PORTS     NAMES
4a..........   ubuntu    "bash"    27 seconds ago   Up 5 seconds             sleepy_spence
따라서 attach 할 수 있음
$ docker attach 4a
root@4af3d933349e:/#
이미지 풀(pull) 정책: --pull
컨테이너를 실행하기 전에 이미지 pulling을 어떻게 할 것인가
- missing(default) : local에 없을 때만 받아온다
- always : 항상 registry에서 받아옴
latest일 때, 시간이 지난 후 local에 있는 이미지와 registry에 있는 이미지가 다른 경우가 발생함- 이때 always가 아닐 경우, 달라도 새로 받지 않고 실행함
- never : 안받아옴. 즉, local에 없으면 실행 안함
- registry에 접근 불가능한 경우(예: 인터넷에 연결되어있지 않은 경우) 사용
- 무조건 local에 있는 것만 사용
$ docker run --pull <missing|always|never> <IMAGE>
🔹 컨테이너 프로세스 및 리소스
컨테이너의 프로세스 목록 확인 : top
- 실행중인 컨테이너만 확인 가능
$ docker top <CONTAINER>- 컨테이너 내의 프로세스는 호스트의 프로세스이다⭐
top명령어로 본 프로세스가 호스트에서ps -ef로 본 프로세스에 포함됨
예시
$ docker top b9
UID                 PID                 PPID                C                   STIME               TTY                 TIME                CMD
root                119733              119713              0                   14:01               ?                   00:00:00            httpd -DFOREGROUND
www-data            119780              119733              0                   14:01               ?                   00:00:00            httpd -DFOREGROUND
www-data            119781              119733              0                   14:01               ?                   00:00:00            httpd -DFOREGROUND
www-data            119782              119733              0                   14:01               ?                   00:00:00            httpd -DFOREGROUND
컨테이너에서 (추가)애플리케이션 실행 : exec
- 추가적인 확인, 변경등이 필요할 때 사용
- 추가적인 애플리케이션이 살아있는한 컨테이너가 종료되지 않음
$ docker exec <CONTAINER> <COMMAND>예시
$ docker exec 4a hostname
4af3d933349e
기존의 프로세스 그대로 두고 bash만 추가됨
attach로 다시 접속할 방법은 없음
$ docker exec -it a8 bash$ docker exec a8 cat /etc/httpd/conf/httpd.conf참고) 컨테이너 내에는 vi는 없음 : exec로 파일 내용을 수정할 때에는 다른 방법을 찾아야함
컨테이너 리소스 사용량 확인
- container 목록, CPU, 리소스 양 등 확인가능
- 실시간으로 1초에 한번씩 refresh 됨
$ docker stats- 현재 시점에 한번만 정보 확인
$ docker stats --no-stream프로세스는 특별한 제한을 걸지 않는 이상 host가 가지고 있는 자원을 모두 사용할 수 있음
$ docker stats --no-stream
CONTAINER ID   NAME            CPU %     MEM USAGE / LIMIT    MEM %     NET I/O       BLOCK I/O     PIDS
b982.........  lucid_spence    0.01%     6.445MiB / 3.84GiB   0.16%     1.08kB / 0B   0B / 0B       82
4af3.........  sleepy_spence   0.00%     1.453MiB / 3.84GiB   0.04%     1.37kB / 0B   24.6kB / 0B   1
컨테이너 (cpu/memory) 리소스 제한
- 항상 완벽하지는 않음 => 가끔 제한을 조금 넘어갈 수도 있음
$ docker run --cpus 0.1 -d ubuntu sha256sum /dev/zero$ docker run --cpus 0.1 --memory 100m ubuntu sha256sum /dev/zero
컨테이너 리소스 제한 변경
docker update --cpus 0.2 da
docker update --memory 200m da
컨테이너 로그(stdout/stderr) 확인
- 컨테이너 내에 로그를 남기지 않음
- 컨테이너를 삭제하면 로그도 삭제됨(삭제되지만 않으면 로그는 있음)
- 문제 : 로그는 어딘가에 반드시 남겨둬야함
- 해결방법
syslog을 원격에 구성 : but, 쿠버네티스에서 사용 안함frontdAmazon Cloudwatch에 로그 넘기기
/var/lib/docker/containers에 컨테이너ID로된 로그파일 존재
/var/lib/docker/container/<ID>/<ID>-json.log- 위의 로그 파일을 열어보는 명령어
$ docker logs <CONTAINER>✔️ 환경변수
환경변수는 애플리케이션 실행에 영향을 줌
일부 이미지는 실행시 환경 변수(shell의 변수)가 필요함
-e옵션 사용
$ docker run -e A=100 ubuntu
$ docker run -it -e A=100 ubuntu
root@8879938ce00f:/# env
HOSTNAME=8879938ce00f
PWD=/
A=100  #확인
HOME=/root
...mysql,mariadb등 일반적으로 데이터베이스 실행 시 많이 사용됨 : 패스워드 환경변수를 설정해주지 않으면 사용 불가능- docker hub mysql
$ docker ps -a
CONTAINER ID   IMAGE       COMMAND                  CREATED          STATUS                          PORTS     NAMES
63e1......   mysql:5.7   "docker-entrypoint.s…"   27 seconds ago   Exited (1) 22 seconds ago                 mystifying_archimedes
$ docker logs 63
2022-05-04 15:34:01+00:00 [Note] [Entrypoint]: Entrypoint script for MySQL Server 5.7.38-1debian10 started.
2022-05-04 15:34:01+00:00 [Note] [Entrypoint]: Switching to dedicated user 'mysql'
2022-05-04 15:34:01+00:00 [Note] [Entrypoint]: Entrypoint script for MySQL Server 5.7.38-1debian10 started.
2022-05-04 15:34:01+00:00 [ERROR] [Entrypoint]: Database is uninitialized and password option is not specified
You need to specify one of the following: #아래 환경변수 3개 중 최소 1개는 설정해야한다
- MYSQL_ROOT_PASSWORD #패스워드 직접 지정
- MYSQL_ALLOW_EMPTY_PASSWORD #패스워드 없는 계정 허용 여부
- MYSQL_RANDOM_ROOT_PASSWORD #패스워드 랜덤 설정$ docker run -d -e MYSQL_ROOT_PASSWORD=P@ssw0rd -e mysql:5.7로그로 정상적으로 작동중인지 확인할 수 있음
$ docker logs a03306 포트가 열리고 준비된 것을 확인할 수 있음
...
2022-05-04T15:52:53.799509Z 0 [Note] mysqld: ready for connections.
Version: '5.7.38'  socket: '/var/run/mysqld/mysqld.sock'  port: 3306  MySQL Community Server (GPL)
접속
$ docker top a0
UID                 PID                 PPID                C                   STIME               TTY                 TIME                CMD
systemd+            195849              195827              0                   15:52               ?                   00:00:00            mysqld
$ docker exec -it a0 bash
root@a09f35f827bc:/# mysql -u root -p
Enter password:
Welcome to the MySQL monitor.  Commands end with ; or \g.
Your MySQL connection id is 2
Server version: 5.7.38 MySQL Community Server (GPL)

Copyright (c) 2000, 2022, Oracle and/or its affiliates.

Oracle is a registered trademark of Oracle Corporation and/or its
affiliates. Other names may be trademarks of their respective
owners.

Type 'help;' or '\h' for help. Type '\c' to clear the current input statement.

mysql>- 데이터베이스 추가해보기
$ docker run -d -e MYSQL_ROOT_PASSWORD=P@ssw0rd -e MYSQL_DATABASE=wordpress mysql:5.7확인
$ docker ps
CONTAINER ID   IMAGE       COMMAND                  CREATED          STATUS          PORTS                 NAMES
df81f3ab1909   mysql:5.7   "docker-entrypoint.s…"   59 seconds ago   Up 57 seconds   3306/tcp, 33060/tcp   jolly_dirac
$ docker exec -it df mysql -u root -p
Enter password:
Welcome to the MySQL monitor.  Commands end with ; or \g.
Your MySQL connection id is 2
Server version: 5.7.38 MySQL Community Server (GPL)

Copyright (c) 2000, 2022, Oracle and/or its affiliates.

Oracle is a registered trademark of Oracle Corporation and/or its
affiliates. Other names may be trademarks of their respective
owners.

Type 'help;' or '\h' for help. Type '\c' to clear the current input statement.

mysql> show databases;
+--------------------+
| Database           |
+--------------------+
| information_schema |
| mysql              |
| performance_schema |
| sys                |
| wordpress          |
+--------------------+
5 rows in set (0.00 sec)
컨테이너마다 고유한 네트워크와 IP가 존재함⭐ => 컨테이너와 컨테이너간의 통신도 가능
$ docker inspect df -f '{{ .NetworkSettings.IPAddress }}'
172.17.0.2- 우분투에서 mysql 컨테이너로 접속해보기
ubuntu 실행 후 ctrl + p + q
ip 주소 확인
$ docker run -it ubuntu bash
$ docker inspect 0a -f '{{ .NetworkSettings.IPAddress }}'
172.17.0.3
attach 로 ubuntu 접속
$ docker attach 0a
root@0ae5d130c071:/# apt update
root@0ae5d130c071:/# apt install mysql-client
root@0ae5d130c071:/# mysql -h 172.17.0.2 -u root -p
Enter password:
Welcome to the MySQL monitor.  Commands end with ; or \g.
Your MySQL connection id is 5
Server version: 5.7.38 MySQL Community Server (GPL)

Copyright (c) 2000, 2022, Oracle and/or its affiliates.

Oracle is a registered trademark of Oracle Corporation and/or its
affiliates. Other names may be trademarks of their respective
owners.

Type 'help;' or '\h' for help. Type '\c' to clear the current input statement.

mysql> show databases;
+--------------------+
| Database           |
+--------------------+
| information_schema |
| mysql              |
| performance_schema |
| sys                |
| wordpress          |
+--------------------+
5 rows in set (0.00 sec)- mysql 하나 더 만들어서 mysql에서 접속(mysql 설치 필요 없음)
$ docker run -it mysql:5.7 bash
root@be8e32b89a15:/# mysql -h 172.17.0.2 -u root -p
✔️ 컨테이너 Discovery
특정 client가 서버를 찾는 것
- 찾고자하는(연결하고자 하는) 컨테이너를
--link로 지정해주면, 자동으로/etc/hosts에 등록됨 - 이름으로 접속 가능
docker run -it --link jolly_dirac mysql:5.7 bash
root@cdfa30a5b6e7:/# cat /etc/hosts
127.0.0.1       localhost
::1     localhost ip6-localhost ip6-loopback
fe00::0 ip6-localnet
ff00::0 ip6-mcastprefix
ff02::1 ip6-allnodes
ff02::2 ip6-allrouters
172.17.0.2      jolly_dirac df81f3ab1909
172.17.0.3      cdfa30a5b6e7
root@cdfa30a5b6e7:/# mysql -h jolly_dirac -u root -p #이름으로 접속
Enter password:
Welcome to the MySQL monitor.  Commands end with ; or \g.
Your MySQL connection id is 7
Server version: 5.7.38 MySQL Community Server (GPL)

Copyright (c) 2000, 2022, Oracle and/or its affiliates.

Oracle is a registered trademark of Oracle Corporation and/or its
affiliates. Other names may be trademarks of their respective
owners.

Type 'help;' or '\h' for help. Type '\c' to clear the current input statement.

mysql>
--name 옵션으로 이름을 지정하면 더 편리하게 사용 가능
$ docker run --name mysqldb -d -e MYSQL_ROOT_PASSWORD=P@ssw0rd mysql:5.7$ docker run -it --link mysqldb ubuntu bash
> cat /etc/hosts
>> 172.17.X.X mysqldb별칭(alias) 지정 가능
예: mysqldb:xyz => xyz가 mysqldb의 별칭
$ docker run -it --link mysqldb:xyz ubuntu bash

> cat /etc/hosts
>> 172.17.X.X mysqldb xyz
$ docker run -it --link mysqldb:xyz mysql:5.7 mysql -h xyz -u root -p-p (publish) : 컨테이너 포트를 호스트에 publish(노출 시킴)
=> 컨테이너의 포트를 호스트의 포트로 포워딩 (포트 포워딩)⭐ : 외부에서 내부로 접속할 수 있게됨
- 다른 프로세스가 사용하고 있으면 사용 불가
$ docker run -p <HOST>:<CONTAINER> <IMAGE>httpd이미지의 포트는 정해져있음:ExposedPorts=> 컨테이너의 포트는 바뀔일 없음
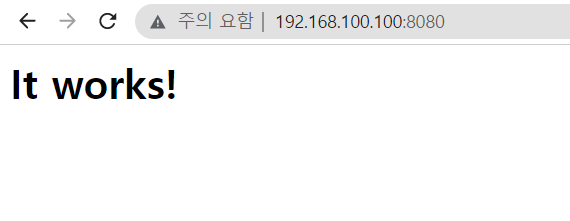
$ docker run -d -p 8080:80 httpd
$ docker run -d httpd
CONTAINER ID IMAGE COMMAND CREATED STATUS PORTS NAMES
69fbe1729dd1 httpd "httpd-foreground" 7 seconds ago Up 6 seconds 80/tcp optimistic_shtern
a26090ef22f8 httpd "httpd-foreground" About a minute ago Up About a minute 0.0.0.0:8080->80/tcp, :::8080->80/tcp upbeat_golick0.0.0.0:8080->80/tcp 의 의미: 호스트의 8080포트로 접속하면, 컨테이너의 80포트로 전달시켜주겠다
VM의 IP : 192.168.100.100