
✔️ Ingress란?
상당히 오랜 기간 동안 beta 버전이었다가, 비교적 최근에 stable 버전이 되었다.
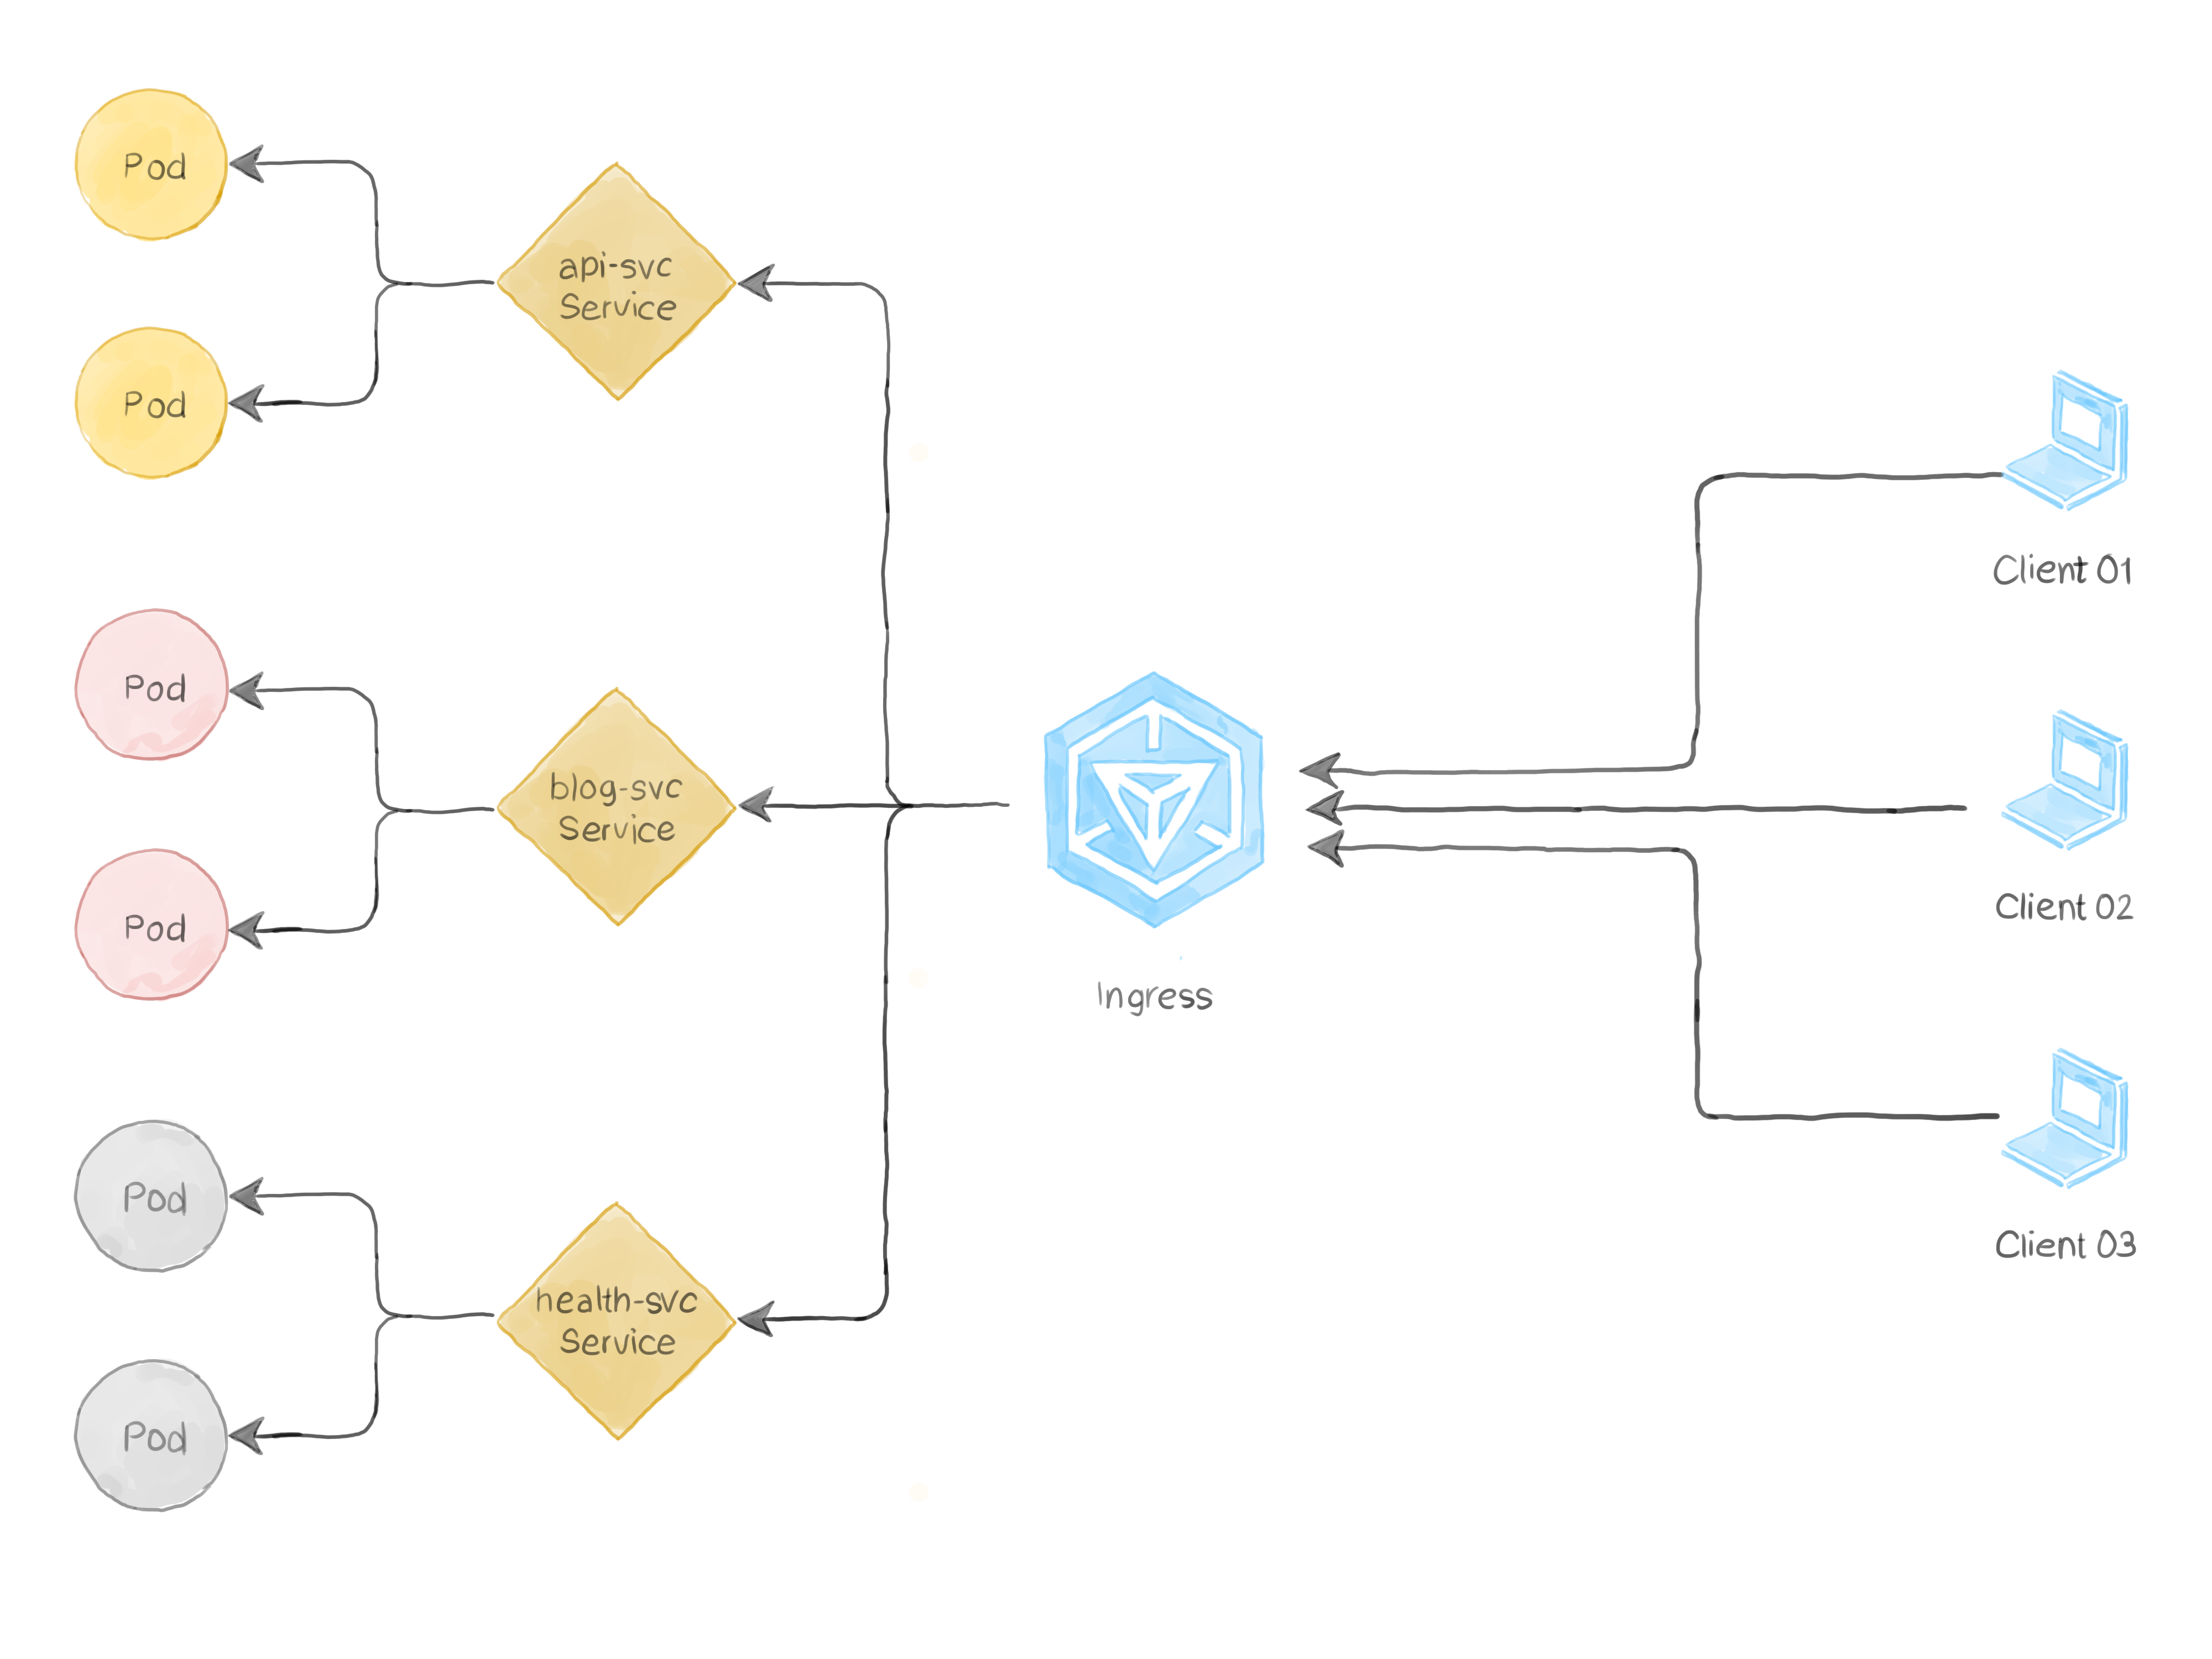
인그레스(ingress)란, 클러스터 외부에서 내부 서비스로 접근하는
HTTP, HTTPS (L7) 요청들의 처리 방법을 정의해둔 규칙들의 모음으로,
클러스터 외부에서 클러스터 내부 서비스로 HTTP와 HTTPS 경로를 노출한다.
클러스터 외부에서 접근 가능한 URL을 사용할 수 있게 하며,
트래픽의 로드밸런싱, SSL 인증서의 처리, 도메인 기반의 가상 호스팅을 제공하기도 한다.
인그레스는 임의의 포트 또는 프로토콜을 노출시키지 않으며,
HTTP와 HTTPS 이외의 서비스를 인터넷에 노출하려면
일반적으로 Service.Type=NodePort 또는 Service.Type=LoadBalancer 유형의 서비스를 사용한다.
인그레스 자체는 이러한 규칙들을 정의해둔 자원이고,
인그레스 리소스(규칙)를 실질적으로 구현해주는 것을 인그레스 컨트롤러(Ingress Controller)라고 한다.
인그레스 리소스가 작동하려면, 클러스터는 실행 중인 인그레스 컨트롤러가 반드시 필요하며,
프로젝트로서 쿠버네티스는 AWS, GCE와 nginx 인그레스 컨트롤러를 지원하고 유지한다.
다음은 인그레스가 모든 트래픽을 하나의 서비스로 보내는 간단한 예시이다.
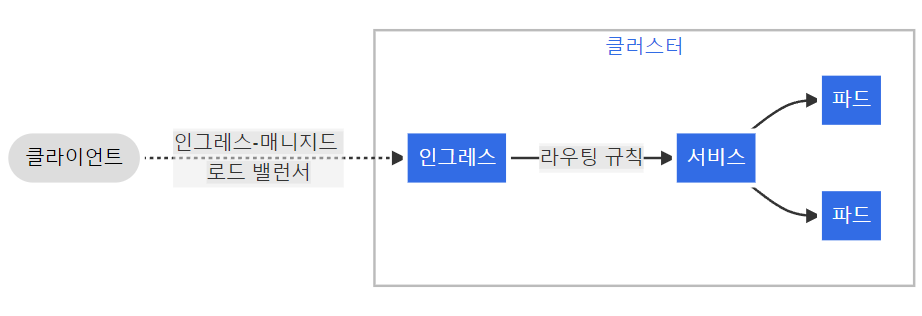
예시 설명
- 클러스터에 인그레스 리소스가 만들어진다.
- 인그레스 리소스는 서비스(ClusterIP)가 있어야 하며, 서비스는 일반적으로 NodePort를 사용한다.
- 인그레스가 L7 로드밸런서, 서비스가 L4 로드밸런서 역할을 한다.
- 인그레스 라우팅 규칙에 따라서 더 많은 서비스를 연결할 수 있다.
리소스 확인
$ kubectl api-resources | grep ingress
ingressclasses                                 networking.k8s.io/v1                   false        IngressClass
ingresses                         ing          networking.k8s.io/v1                   true         Ingress
☁️ 참고
현재는 niginx 인그레스 컨트롤러 1개를 사용하지만,
경우에 따라 여러 개의 인그레스 컨트롤러를 사용하는 경우가 있다.
여러 개를 사용하는 경우, 각각의 컨트롤러를 클래스(class)로 만들 수 있고,
IngressClass 리소스에 구현해야 하는 컨트롤러를 지정한다.
리소스 정의 방법 확인
$ kubectl explain ingress.spec✔️ Addon 설정하기
~/kubespray/inventory/mycluster/group_vars/k8s-cluster/addons.yml 파일을 다음과 같이 수정한다.
- Niginx Ingress Controller
93 ingress_nginx_enabled: true
- metrics-server
16 metrics_server_enabled: true
플레이북을 실행하여 적용한다.
$ ansible-playbook -i inventory/mycluster/inventory.ini cluster.yml -bingress는 ingrss-nginx 네임스페이스를 사용하며,
$ kubectl get ns
...
ingress-nginx     Active   27h
...
데몬 셋을 통해 각 노드에 1개씩 배치되어있는 ingress-nginx-controller 파드를 확인할 수 있다.
$ kubectl get all -n ingress-nginx
NAME                                 READY   STATUS    RESTARTS      AGE
pod/ingress-nginx-controller-4gfw5   1/1     Running   1 (39m ago)   27h
pod/ingress-nginx-controller-vp7w8   1/1     Running   1 (41m ago)   27h
pod/ingress-nginx-controller-xbj69   1/1     Running   1 (40m ago)   27h

NAME                                      DESIRED   CURRENT   READY   UP-TO-DATE   AVAILABLE   NODE SELECTOR            AGE
daemonset.apps/ingress-nginx-controller   3         3         3       3            3           kubernetes.io/os=linux   27h
metrics-server가 정상적으로 작동 중이라면 이상이 없는 것이다.
$ kubectl get po -n kube-system
NAME                                      READY   STATUS    RESTARTS        AGE
...                     1/1     Running   22 (39m ago)    6d9h
metrics-server-c57c76cf4-4qpgb            1/1     Running   1 (39m ago)     27h
...                      1/1     Running   242 (39m ago)   6d9h
✔️ 라우팅 규칙
ing.spec.rules
host
- hostname과 같은 호스트 구성을 설정한다.
- 실제로 존재하는 도메인을 사용해야한다.
- host를 여러 개 설정하는 것도 가능하다.
$ kubectl explain ing.spec.rules.host
KIND:     Ingress
VERSION:  networking.k8s.io/v1

FIELD:    host <string>

DESCRIPTION:
     Host is the fully qualified domain name of a network host, as defined by
     RFC 3986. Note the following deviations from the "host" part of the URI as
     defined in RFC 3986: 1. IPs are not allowed. Currently an IngressRuleValue
     can only apply to the IP in the Spec of the parent Ingress.
     2. The `:` delimiter is not respected because ports are not allowed.
     Currently the port of an Ingress is implicitly :80 for http and :443 for
     https. Both these may change in the future. Incoming requests are matched
     against the host before the IngressRuleValue. If the host is unspecified,
     the Ingress routes all traffic based on the specified IngressRuleValue.

     Host can be "precise" which is a domain name without the terminating dot of
     a network host (e.g. "foo.bar.com") or "wildcard", which is a domain name
     prefixed with a single wildcard label (e.g. "*.foo.com"). The wildcard
     character '*' must appear by itself as the first DNS label and matches only
     a single label. You cannot have a wildcard label by itself (e.g. Host ==
     "*"). Requests will be matched against the Host field in the following way:
     1. If Host is precise, the request matches this rule if the http host
     header is equal to Host. 2. If Host is a wildcard, then the request matches
     this rule if the http host header is to equal to the suffix (removing the
     first label) of the wildcard rule.
http
paths를 필수로 작성해야 한다 :ing.spec.rules.http.pathsbackend: 연결할 서비스resource: 오브젝트(리소스)apiGroupkindname
servicename: 서비스의 이름port: 연결할 포트name: 포트 이름number: 포트 번호
path: 지정하지 않으면(default) 루트(/)이고, 도메인 뒤의 경로를 지정한다. (예: info -> www.xyx.com/info)- 경로를 여러 개 지정하는 것도 가능하다.
pathType: Exact, Prefix, ImplementationSpecific 3가지가 가능하며, 일반적으로 Exact와 Prefix를 많이 사용한다.- Exact : URL 경로가 정확하게 일치해야 한다.
- Prefix : 지정한 path 아래에 추가적인 경로가 더 붙을 수 있다.
- ImplementationSpecific : 일치 여부는 IngressClass에 따라 달라진다. 이를 구현할 때 별도
pathType으로처리하거나,Prefix또는Exact경로 유형과 같이 동일하게 처리할 수 있다.
$ kubectl explain ing.spec.rules.http.paths
KIND:     Ingress
VERSION:  networking.k8s.io/v1

RESOURCE: paths <[]Object>

DESCRIPTION:
     A collection of paths that map requests to backends.

     HTTPIngressPath associates a path with a backend. Incoming urls matching
     the path are forwarded to the backend.

FIELDS:
   backend      <Object> -required-
     Backend defines the referenced service endpoint to which the traffic will
     be forwarded to.

   path <string>
     Path is matched against the path of an incoming request. Currently it can
     contain characters disallowed from the conventional "path" part of a URL as
     defined by RFC 3986. Paths must begin with a '/' and must be present when
     using PathType with value "Exact" or "Prefix".

   pathType     <string> -required-
     PathType determines the interpretation of the Path matching. PathType can
     be one of the following values: * Exact: Matches the URL path exactly. *
     Prefix: Matches based on a URL path prefix split by '/'. Matching is done
     on a path element by element basis. A path element refers is the list of
     labels in the path split by the '/' separator. A request is a match for
     path p if every p is an element-wise prefix of p of the request path. Note
     that if the last element of the path is a substring of the last element in
     request path, it is not a match (e.g. /foo/bar matches /foo/bar/baz, but
     does not match /foo/barbaz).
     * ImplementationSpecific: Interpretation of the Path matching is up to the
     IngressClass. Implementations can treat this as a separate PathType or
     treat it identically to Prefix or Exact path types. Implementations are
     required to support all path types.
$ kubectl explain ing.spec.rules.http.paths.backend
KIND: Ingress
VERSION: networking.k8s.io/v1
RESOURCE: backend <Object>
DESCRIPTION:
Backend defines the referenced service endpoint to which the traffic will
be forwarded to.
IngressBackend describes all endpoints for a given service and port.
FIELDS:
resource <Object>
Resource is an ObjectRef to another Kubernetes resource in the namespace of
the Ingress object. If resource is specified, a service.Name and
service.Port must not be specified. This is a mutually exclusive setting
with "Service".
service <Object>
Service references a Service as a Backend. This is a mutually exclusive
setting with "Resource".예제
| 종류 | 경로 | 요청 경로 | 일치 여부 |
|---|---|---|---|
| Prefix | / |
(모든 경로) | 예 |
| Exact | /foo |
/foo |
예 |
| Exact | /foo |
/bar |
아니오 |
| Exact | /foo |
/foo/ |
아니오 |
| Exact | /foo/ |
/foo |
아니오 |
| Prefix | /foo |
/foo, /foo/ |
예 |
| Prefix | /foo/ |
/foo, /foo/ |
예 |
| Prefix | /aaa/bb |
/aaa/bbb |
아니오 |
| Prefix | /aaa/bbb |
/aaa/bbb |
예 |
| Prefix | /aaa/bbb/ |
/aaa/bbb |
예, 마지막 슬래시 무시함 |
| Prefix | /aaa/bbb |
/aaa/bbb/ |
예, 마지막 슬래시 일치함 |
| Prefix | /aaa/bbb |
/aaa/bbb/ccc |
예, 하위 경로 일치함 |
| Prefix | /aaa/bbb |
/aaa/bbbxyz |
아니오, 문자열 접두사 일치하지 않음 |
| Prefix | /, /aaa |
/aaa/ccc |
예, /aaa 접두사 일치함 |
| Prefix | /, /aaa, /aaa/bbb |
/aaa/bbb |
예, /aaa/bbb 접두사 일치함 |
| Prefix | /, /aaa, /aaa/bbb |
/ccc |
예, / 접두사 일치함 |
| Prefix | /aaa |
/ccc |
아니오, 기본 백엔드 사용함 |
| Mixed | /foo (Prefix), /foo (Exact) |
/foo |
예, Exact 선호함 |
다중 일치
경우에 따라 인그레스의 여러 경로가 요청과 일치할 수 있다. 이 경우 가장 긴 일치하는 경로가 우선하게 된다.
두 개의 경로가 여전히 동일하게 일치하는 경우,
접두사(prefix) 경로 유형보다 정확한(exact) 경로 유형을 가진 경로가 사용된다.
예시
apiVersion: networking.k8s.io/v1
kind: Ingress
metadata:
  name: ingress-wildcard-host
spec:
  rules:
  - host: "foo.bar.com"
    http:
      paths:
      - pathType: Prefix
        path: "/bar"
        backend:
          service:
            name: service1
            port:
              number: 80
  - host: "*.foo.com"
    http:
      paths:
      - pathType: Prefix
        path: "/foo"
        backend:
          service:
            name: service2
            port:
              number: 80
rules를 리스트로 지정한 것을 확인할 수 있고, 여기서 리스트는 순서가 중요하다.
작은 scope(범위) 순서부터 지정해야 한다. ⭐
예를 들어 현재에서 foo.bar.com와 *.foo.com의 순서를 바꾸게 되면,
모든 정책이 *.foo.com에 매칭 되고, foo.bar.com에는 매칭 되지 않게 된다.
💻 실습 1
여기에 이어서 실습을 진행한다.
myweb-rs.yaml
apiVersion: apps/v1
kind: ReplicaSet
metadata:
  name: myweb-rs
spec:
  replicas: 3
  selector:
    matchLabels:
      app: web
      env: dev
  template:
    metadata:
      labels:
        app: web
        env: dev
    spec:
      containers:
        - name: myweb
          image: ghcr.io/c1t1d0s7/go-myweb
          ports:
            - containerPort: 8080
              protocol: TCP
myweb-svc-np.yaml
apiVersion: apps/v1
kind: ReplicaSet
metadata:
  name: myweb-rs
spec:
  replicas: 3
  selector:
    matchLabels:
      app: web
      env: dev
  template:
    metadata:
      labels:
        app: web
        env: dev
    spec:
      containers:
        - name: myweb
          image: ghcr.io/c1t1d0s7/go-myweb
          ports:
            - containerPort: 8080
              protocol: TCP
myweb-ing.yaml
apiVersion: networking.k8s.io/v1
kind: Ingress
metadata:
  name: myweb-ing
spec:
  rules:
    - http:
        paths:
          - path: / #root의 아무데로 들어와도 된다는 뜻
            pathType: Prefix
            backend:
              service:
                name: myweb-svc-np
                port:
                  number: 80 #cluserIP의 포트
myweb-rs.yaml과 myweb-svc-np.yaml은 이미 실행된 상태이므로 인그레스만 생성한다.
$ kubectl create -f myweb-ing.yaml모든(all) 리소스에는 인그레스 리소스가 포함되어있지 않기 때문에
다음 명령어로는 인그레스 리소스를 확인할 수 없다.
$ kubectl get all
NAME                 READY   STATUS    RESTARTS   AGE
pod/myweb-rs-bmzj7   1/1     Running   0          4m24s
pod/myweb-rs-dkmvt   1/1     Running   0          4m24s
pod/myweb-rs-gddzl   1/1     Running   0          4m24s

NAME                      TYPE           CLUSTER-IP      EXTERNAL-IP       PORT(S)        AGE
service/kubernetes        ClusterIP      10.233.0.1      <none>            443/TCP        3d
service/myweb-svc-np      LoadBalancer   10.233.19.105   192.168.100.240   80:31313/TCP   33h
service/weather-ext-svc   ExternalName   <none>          wttr.in           <none>         31h

NAME                       DESIRED   CURRENT   READY   AGE
replicaset.apps/myweb-rs   3         3         3       4m24s
인그레스 컨트롤러는 모든 노드에 하나씩 존재하고, 실제로 로드밸런서 역할을 한다.
따라서 모든 노드에 걸쳐서 생성되기 때문에 어느 노드로 접속하든 상관이 없다.
$ kubectl get ing
NAME        CLASS    HOSTS   ADDRESS                                           PORTS   AGE
myweb-ing   <none>   *       192.168.100.100,192.168.100.101,192.168.100.102   80      86s
$ kubectl get po -n ingress-nginx -o wide
NAME READY STATUS RESTARTS AGE IP NODE NOMINATED NODE READINESS GATES
ingress-nginx-controller-4gfw5 1/1 Running 1 (146m ago) 29h 10.233.92.255 node3 <none> <none>
ingress-nginx-controller-vp7w8 1/1 Running 1 (147m ago) 29h 10.233.90.79 node1 <none> <none>
ingress-nginx-controller-xbj69 1/1 Running 1 (147m ago) 29h 10.233.96.92 node2 <none> <none>kubectl describe 명령어를 사용하면 더욱 명확하게 정보를 확인할 수 있다.
$ kubectl describe ing myweb-ing
Name:             myweb-ing
Namespace:        default
Address:          192.168.100.100,192.168.100.101,192.168.100.102
Default backend:  default-http-backend:80 (<error: endpoints "default-http-backend" not found>)
Rules:
  Host        Path  Backends
  ----        ----  --------
  *
              /   myweb-svc-np:80 (10.233.90.84:8080,10.233.92.5:8080,10.233.96.97:8080)
Annotations:  <none>
Events:
  Type    Reason  Age                 From                      Message
  ----    ------  ----                ----                      -------
  Normal  Sync    39s (x3 over 3h9m)  nginx-ingress-controller  Scheduled for sync
  Normal  Sync    39s (x3 over 3h9m)  nginx-ingress-controller  Scheduled for sync
  Normal  Sync    39s (x3 over 3h9m)  nginx-ingress-controller  Scheduled for sync
-v 옵션을 사용하여 어떻게 질의와 응답이 오가는지 확인해보자.
>로 표시된 것은 질의(Query)이고, <로 표시된 것은 응답(Response)이다.
$ curl http://192.168.100.100 -v
*   Trying 192.168.100.100:80...
* TCP_NODELAY set
* Connected to 192.168.100.100 (192.168.100.100) port 80 (#0)
> GET / HTTP/1.1 #GET방식의 HTTP메소드, path: / , 프로토콜 HTTP/1.1
> Host: 192.168.100.100 #Ingress가 확인하는 정책
> User-Agent: curl/7.68.0
> Accept: */*
>
* Mark bundle as not supporting multiuse
< HTTP/1.1 200 OK
< Date: Mon, 23 May 2022 06:10:59 GMT
< Content-Type: text/plain; charset=utf-8
< Content-Length: 28
< Connection: keep-alive
<
Hello World!
myweb-rs-gddzl
* Connection #0 to host 192.168.100.100 left intact
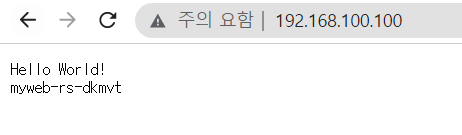
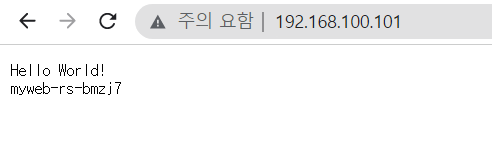
모든 노드로 접속 가능한 것을 확인할 수 있다.
$ curl 192.168.100.100
Hello World!
myweb-rs-gddzl
$ curl 192.168.100.101
Hello World!
myweb-rs-dkmvt
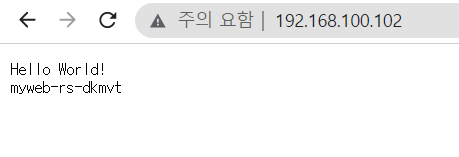
$ curl 192.168.100.102
Hello World!
myweb-rs-gddzl
💻 실습 2
앞선 실습에 이어서 아무거나 임의의 호스트를 추가해보자.
myweb-ing.yaml
apiVersion: networking.k8s.io/v1
kind: Ingress
metadata:
  name: myweb-ing
spec:
  rules:
    - host: '*.ny.xyz'
      http:
        paths:
          - path: /
            pathType: Prefix
            backend:
              service:
                name: myweb-svc-np
                port:
                  number: 80
$ kubectl replace -f myweb-ing.yamlkubectl describe 명령어로 확인
$ kubectl describe ing myweb-ing
Name:             myweb-ing
Namespace:        default
Address:          192.168.100.100,192.168.100.101,192.168.100.102
Default backend:  default-http-backend:80 (<error: endpoints "default-http-backend" not found>)
Rules:
  Host        Path  Backends
  ----        ----  --------
  *.ny.xyz
              /   myweb-svc-np:80 (10.233.90.84:8080,10.233.92.5:8080,10.233.96.97:8080)
Annotations:  <none>
Events:
  Type    Reason  Age                 From                      Message
  ----    ------  ----                ----                      -------
  Normal  Sync    3s (x4 over 3h28m)  nginx-ingress-controller  Scheduled for sync
  Normal  Sync    3s (x4 over 3h28m)  nginx-ingress-controller  Scheduled for sync
  Normal  Sync    3s (x4 over 3h28m)  nginx-ingress-controller  Scheduled for sync
-v 옵션을 사용하여 어떻게 질의응답을 확인해보자.
$ curl http://192.168.100.100 -v
*   Trying 192.168.100.100:80...
* TCP_NODELAY set
* Connected to 192.168.100.100 (192.168.100.100) port 80 (#0)
> GET / HTTP/1.1
> Host: 192.168.100.100
> User-Agent: curl/7.68.0
> Accept: */*
>
* Mark bundle as not supporting multiuse
< HTTP/1.1 404 Not Found
< Date: Mon, 23 May 2022 06:24:37 GMT
< Content-Type: text/html
< Content-Length: 146
< Connection: keep-alive
<
<html>
<head><title>404 Not Found</title></head>
<body>
<center><h1>404 Not Found</h1></center>
<hr><center>nginx</center>
</body>
</html>
* Connection #0 to host 192.168.100.100 left intact*.ny.xyz과 192.168.100.100이 매칭 되지 않기 때문에 404 Not Found 응답이 온 것을 확인할 수 있다.
우리가 만약 www.google.com에 접속한다고 해보자.
그러면 HTTP 헤더의 Host는 www.google.com이 되고, IP의 Source는 우리의 브라우저 시스템 x.x.x.x이며, Destination은 DNS질의를 통해 돌아온 www.google.com의 IP주소가 된다.
그러나 만약 1.1.1.1과 같이 이름 형태의 FQDN을 구성하지 않게 되면,
HTTP의 헤더는 1.1.1.1이 되고, IP의 Destination도 1.1.1.1이 되어 통신을 할 수 없게 된다.
실제로 테스팅을 할 때는 매번 도메인을 구입할 수 없기 때문에 도메인 없이 테스팅을 진행한다.
해결방법을 설명하는 다음 주제를 살펴보자.
✔️ 도메인 없이 테스트하는 방법
curl의 --resolve 옵션 사용하기
첫 번째는 curl의 --resolve옵션을 사용하는 것이다.
$ curl --resolve www.ny.xyz:80:192.168.100.100 http://www.ny.xyz
Hello World!
myweb-rs-bmzj7www.ny.xyz:80:192.168.100.100는 www.ny.xyz의 80번 포트는 192.168.100.100로 바꾸라는 의미이다.
그리고 그 뒤의 주소는 우리가 요청하는 주소이다.
-v 옵션으로 확인해보자
$ curl --resolve www.ny.xyz:80:192.168.100.100 http://www.ny.xyz -v
* Added www.ny.xyz:80:192.168.100.100 to DNS cache
* Hostname www.ny.xyz was found in DNS cache
*   Trying 192.168.100.100:80...
* TCP_NODELAY set
* Connected to www.ny.xyz (192.168.100.100) port 80 (#0)
> GET / HTTP/1.1
> Host: www.ny.xyz
> User-Agent: curl/7.68.0
> Accept: */*
>
* Mark bundle as not supporting multiuse
< HTTP/1.1 200 OK
< Date: Mon, 23 May 2022 06:42:47 GMT
< Content-Type: text/plain; charset=utf-8
< Content-Length: 28
< Connection: keep-alive
<
Hello World!
myweb-rs-bmzj7
* Connection #0 to host www.ny.xyz left intact
접속을 요청한 것은 192.168.100.100이기 때문에 Host에 설정된 것을 확인할 수 있고,
Connected 부분을 살펴보면,
실제로 192.168.100.100(IP Destination)의 80번 포트(TCP 포트)로 통신한 것을 확인할 수 있다.
이와 같이 실제 도메인이 없는 경우에 --resolve 옵션을 이용하여 테스트해볼 수 있다.
/etc/hosts 파일 이용하기
NS(네임서버)에서 host 타입의 서버를 확인해보자.
files:/etc/hostsdns:/etc/resolv.conf
$ grep host /etc/nsswitch.conf
hosts:          files dns
호스트 서버를 resolve(풀이)를 할 때 순서는 files를 먼저 보고, 다음으로 dns를 확인한다.
따라서 /etc/hosts파일에 다음과 같이 임의의 도메인을 추가해주는 것이다.
/etc/hosts
...
192.168.100.100 www.ny.xyz
...
이제 다시 접속을 시도하면 다음과 같이 정상적으로 통신이 되는 것을 확인할 수 있다.
$ curl http://www.ny.xyz
Hello World!
myweb-rs-gddzl
/etc/hosts 파일을 수정하는 방법이 첫 번째 방법보다 편리하긴 하지만,
잘 관리를 해주지 않으면 꼬여서 문제가 생길 수 있기 때문에
일반적으로 안전하면서 확실한 첫 번째 방법(--resolve 옵션 사용)을 권장한다.
Wildcard DNS
https://nip.io/ (또는 https://sslip.io/ -> ipv6까지 지원)
wildcard DNS는 무엇을 요청하든, 응답을 돌려주는 DNS 서버이다.
다음과 같이 항상 뒤에 nip.io를 붙여주면 되며, 홈페이지에서 여러 가지 형태를 확인할 수 있다.
$  host 10.10.10.10.nip.io
10.10.10.10.nip.io has address 10.10.10.10
$ host www.10.10.10.10.nip.io
www.10.10.10.10.nip.io has address 10.10.10.10
$ host www.10-10-10-10.nip.io
www.10-10-10-10.nip.io has address 10.10.10.10
어떤 형식을 사용하든 주소의 IP를 리턴해준다.
즉, . nip.io 앞에 뭘 붙히든, 어떤 주소 형태가 들어가게 되면 그 주소를 인식하여 리턴해주는 서비스이다.
실제로 테스팅할 때 많이 사용하는 방법이다.
다음과 같이 앞서 사용했던 myweb-ing.yaml을 수정해보자
myweb-ing.yaml
apiVersion: networking.k8s.io/v1
kind: Ingress
metadata:
  name: myweb-ing
spec:
  rules:
    - host: '*.nip.io'
      http:
        paths:
          - path: /
            pathType: Prefix
            backend:
              service:
                name: myweb-svc-np
                port:
                  number: 80
$ kubectl replace -f myweb-ing.yaml접속이 정상적으로 이루어지는 것을 확인할 수 있다.
$ curl http://192-168-100-100.nip.io
Hello World!
myweb-rs-dkmvt
$ curl http://192-168-100-100.nip.io -v
* Trying 192.168.100.100:80...
* TCP_NODELAY set
* Connected to 192-168-100-100.nip.io (192.168.100.100) port 80 (#0)
> GET / HTTP/1.1
> Host: 192-168-100-100.nip.io
> User-Agent: curl/7.68.0
> Accept: */*
>
* Mark bundle as not supporting multiuse
< HTTP/1.1 200 OK
< Date: Mon, 23 May 2022 07:31:55 GMT
< Content-Type: text/plain; charset=utf-8
< Content-Length: 28
< Connection: keep-alive
<
Hello World!
myweb-rs-gddzl
* Connection #0 to host 192-168-100-100.nip.io left intact✔️ Ingress 예제
docker 구성이 완료된 VM에서 사용할 이미지를 빌드할 예정이다.
docker 설치가 안되어있다면 docker 설치 및 개요를 참조하면 된다.
hello:one 이미지
Dockerfile
FROM httpd
COPY index.html /usr/local/apache2/htdocs/index.html
index.html
<h1> Hello One </h1>
hello:two 이미지
Dockerfile
FROM httpd
COPY index.html /usr/local/apache2/htdocs/index.html
index.html
<h1> Hello Two </h1>
이미지를 빌드한다.
$ docker image build X/hello:one
$ docker image build X/hello:two
dokerhub에 이미지를 올리기 위해 docker login으로 인증한다.
$ docker login
생성한 이미지를 push 한다.
$ docker push X/hello:one
$ docker push X/hello:two
ReplicaSets
one-rs.yaml
apiVersion: apps/v1
kind: ReplicaSet
metadata:
  name: one-rs
spec:
  replicas: 3
  selector:
    matchLabels:
      app: hello-one
  template:
    metadata:
      labels:
        app: hello-one
    spec:
      containers:
        - name: hello-one
          image: na3150/hello:one
          ports:
            - containerPort: 80
              protocol: TCP
two-rs.yaml
apiVersion: apps/v1
kind: ReplicaSet
metadata:
  name: two-rs
spec:
  replicas: 3
  selector:
    matchLabels:
      app: hello-two
  template:
    metadata:
      labels:
        app: hello-two
    spec:
      containers:
        - name: hello-two
          image: na3150/hello:two
          ports:
            - containerPort: 80
              protocol: TCP
Service
one-svc-np.yaml
apiVersion: v1
kind: Service
metadata:
  name: one-svc-np
spec:
  type: NodePort
  selector:
    app: hello-one
  ports:
    - port: 80
      targetPort: 80
two-svc-np.yaml
apiVersion: v1
kind: Service
metadata:
  name: two-svc-np
spec:
  type: NodePort
  selector:
    app: hello-two
  ports:
    - port: 80
      targetPort: 80
Ingress
hello-ing.yaml
apiVersion: networking.k8s.io/v1
kind: Ingress
metadata:
  name: hello-ing
  annotations:
    nginx.ingress.kubernetes.io/rewrite-target: / # URL 재작성, /one -> /, /two -> /
spec:
  rules:
    - host: '*.nip.io'
      http:
        paths:
          - path: /one
            pathType: Prefix
            backend:
              service:
                name: one-svc-np
                port:
                  number: 80
          - path: /two
            pathType: Prefix
            backend:
              service:
                name: two-svc-np
                port:
                  number: 80
annotation은 key:value 쌍으로 구성되는 비식별 데이터로,
애플리케이션이 해당 메타데이터를 참조할 수 있다.
단순히 참조하는 것뿐만 아니라, 실제로 애플리케이션 작동을 변경할 수 있다.
L7 LB rewrite
nginx.ingress.kubernetes.io/rewrite-target: 의 의미 : URL을 재작성하라⭐
- ingress-nginx 네임스페이스의 ingress controller에서
nginx.ingress.kubernetes.iokey를 가지고 있는 target(백엔드)의 경로를 rewrite(재작성)하라. - 예 :
x.nip.io/one-->IP주소/ - 이러한 설정을 하지 않는 경우
x.nip.io/one->IP주소/one으로 접속을 시도하게 된다. - 본 실습에서는
/one경로가 없기 때문에 rewrite이 필요한 것이고, 실제로/one경로가 있다면 rewrite 설정을 해주지 않아도 무방하다.
$ kubectl create -f .모두 정상적으로 생성 및 실행된 것을 확인할 수 있다.
$ kubectl get all,ing
NAME                 READY   STATUS    RESTARTS      AGE
pod/one-rs-fjn2x     1/1     Running   0             76s
pod/one-rs-scs6d     1/1     Running   0             76s
pod/one-rs-v49ml     1/1     Running   0             76s
pod/two-rs-74n75     1/1     Running   0             76s
pod/two-rs-nz8mq     1/1     Running   0             76s
pod/two-rs-vx7fr     1/1     Running   0             76s

NAME                      TYPE           CLUSTER-IP      EXTERNAL-IP       PORT(S)        AGE
service/kubernetes        ClusterIP      10.233.0.1      <none>            443/TCP        3d12h
service/one-svc-np        NodePort       10.233.61.146   <none>            80:31235/TCP   76s
service/two-svc-np        NodePort       10.233.39.128   <none>            80:30005/TCP   76s

NAME                       DESIRED   CURRENT   READY   AGE
replicaset.apps/one-rs     3         3         3       76s
replicaset.apps/two-rs     3         3         3       76s

NAME                                  CLASS    HOSTS      ADDRESS                                           PORTS   AGE
ingress.networking.k8s.io/hello-ing   <none>   *.nip.io   192.168.100.100,192.168.100.101,192.168.100.102   80      76s
접속 확인
$ curl http://192-168-100-100.nip.io/one
<h1> Hello One </h1>
$ curl http://192-168-100-100.nip.io/two
<h1> Hello Two </h1>
☁️ 참고
Buildah : 이미지를 빌드하는 도구